Saturday, January 30, 2016

How About A Weskit To Go With That?

I'm not done yet. On the left you see the material I've picked out for another weskit. Again, it's satin jacquard to complement the coat on the right, but I'm hoping it doesn't overpower the look. On the other hand, a weskit I have with my 1700's blue satin jacket has intricately embroidered roses that catch many an eye. People always ask about it. That could count as overpowering.


The fabric came from Hancock -- and yes, I found it on sale. I bought 2.5 yards, thinking I would need it for such a long weskit. But I may still have a lot left over. Breeches anyone?

Stay tuned for the result...

Friday, January 29, 2016

The Big Finish

After about a month of work, off and on, my new satin jaquard coat is ready to go. I have finally added the buttons. I am debating whether to add a hook fastener to the neck or just cut the top buttonhole out. Or I might just try to let it lie. For that, I may need to stiffen up the left side with starch.


Some lessons I learned:

  • I need pinking shears, or a pinking roller cutter.  The fraying on this material drove me up the wall.  I had to use more Fray Check than a rational tailor would consider, and my sewing advisors who have been following this are probably cringing.
  • I'll try fusible bonding web rather than fabric glue the next time I want to attach gold edging like you see above.  It's holding, but it looks bumpy in some places.
  • I need to find a way to make the sleeves just a little bigger without losing the period-correct look.  I intentionally let out the seam allowance by about a quarter of an inch to give me a little more room. 
This will look better when I'm wearing it.  That picture is coming when I head for Williamsburg.

Thursday, January 28, 2016

The Tricorn Vs. Antifreeze

I bought my first real tricorn hat in 2003, after feeling it was time to move up from that cheap costume-store version. That may have worked for the patriot outfit I wore back in 2001, but it just didn't make it anymore. I didn't know yet that I was drifting into the world of re-enacting.

I did know this: a version from Jas. Townsend And Son was the right hat at the right price.


The hat and a better outfit made for a better experience.

Then came the time I put it in the back of my car near a half-full container of Peak antifreeze -- a leaky one. The conniving chemicals conspired to wash the blackness of the felt into the whiteness of the tricorn's trim, leaving an unremovable splotchy stain.

The Queen Mother told me not to despair. "You know, I bet that's just bias tape," she said. "We can get some at Walmart."

Ripping out that hand-sewn trim nearly broke my heart. But if silver thread and golden needles wouldn't mend it, perhaps the clean white bias tape around the edges could mend it a bit. The Queen Mum and your servant worked together to iron it on. I also decided to equilateralize the sides for a more triangular shape. The job didn't go perfectly, but the end product looked decent.


"You can always get another hat."

True, but I held on to this one. It has become my casual tricorn, and I have dressed it up a little more. I have worn it to sports bars as an inside joke for work parties, and interesting things always happen. Ladies will come up and want to touch it. People will offer me drinks because of it (soda, because I'm off alcohol), and then there was that one redhead who came out of nowhere and hugged me.

"I gotta get me one of those," I heard a co-worker say.

Now, if we can only get people to stop automatically calling it a pirate hat...

Wednesday, January 27, 2016

Fabric Heaven

Learning as I sew means I do not want to pay a lot for fabric in case I mess up. I'm not ready yet for Burnley & Trowbridge.

So far, I've been pretty fortunate, except for the aforementioned first crack at the puffy peasant shirt. If you need to start with cheap fabric to hedge your bets, the place to go -- at least in Phoenix or Tucson -- is SAS Fabrics.

I've found SAS to be like Goodwill for fabric. Look hard enough, long enough, and you'll find treasure. The location on Speedway in Tucson is where I first starting picking up material for the puffy breeches, followed by the long red coat.


Be forewarned: digging around in some of the piles of fabric can be tedious, but it's worth it. However, I soon discovered their more ordinate Phoenix superstore:


This one is not only bigger, it's more neatly organized. That's how I discovered the satin jacquard for my latest coat project. If only it were closer to Tucson.

My second pick is Hancock Fabrics. Madame Sherri was visiting your humble servant in Tucson when she noticed it as we were driving somewhere else. "You have a Hancock Fabrics?"

"Yes," I said, puzzled. At the time I didn't know two things: 1) Phoenix doesn't have them anymore, and 2) They have a crazy amount of sales. I don't think I've ever seen them at a time when something wasn't on sale. I'm now on their equivalent of their "frequent fabric" card.

A lot of you will swear by Jo-Ann. Nothing wrong with them, and they do offer loads of classes. Fabric for your humble servant's first Puritan outfit came from them. Hobby Lobby also stocks some good finds. A lot of people have also pointed me to Fabrics.com, but I prefer to look at something up close with my own eyes before buying it.

And remember... patience and persistance pays if you're looking for just the right print.

Tuesday, January 26, 2016

Kid Gloves

One of my first sewing projects outside of Home Economics class was taking on a repair job: the Royal Father's driving gloves.

Rewind to a summer vacation circa 1985. We were packing up, but the leather gloves were coming undone. I offered to stitch them up using a Bernina that once belonged to Grandmother Francis. Not only did I think I had the sewing chops, the machine was very similar to the one I had used in school.

I barely remember the job, but I remember the challenges. Parts of the glove were so frayed, I had no leather to even sew on. I don't even think I turned them inside out to make a properly hidden hem. I know more than a few stitches came out crooked. What's more, I think I ended up making the fingers too narrow. I could get my small hands into them, but I wasn't sure about Dad.

Amazingly, he was somehow able to wear them and drive -- at least through part of Missouri.

We don't have that Bernina anymore. I'm not sure when it disappeared from our household, but I imagine it went in a garage sale. When it came time to buy my own machine, inquiring of its location was one of my first tasks. The Queen Mother hadn't seen it in years. We do have one other machine at the family compound in California: an antique pump-pedal Singer. Uh, no.

Monday, January 25, 2016

Let's Get This Right

I decided fix the ugly stitching on my puffier shirt. So I ripped out the stitches in the cuffs and decided to try again.

Here's the before:


And here's the after:


You may not be able to see the changes, but parts of the cuffs definitely look better. Others, meh. At least now the ragged raw edges of the cuff are tucked up into the cuff itself. That's led to a weird deformity in one cuff that I need to press out. I also couldn't get some of the raw edge along the outside of the cuff sewed down. At least there's no more crooked stitches.

Sunday, January 24, 2016

Heavy Metal

If you're looking for a sewing machine, the best piece of advice for you can be expressed in three words: all-metal frame. Be willing to pay for it, and resist the temptation to blow a few starter bucks on a cheap piece of equipment. Plastic parts, I am told, will get you only so far before the entire machine has to go.

The machine I use from Singer -- a quality name -- is a modest device that does what I need and not much more. I'm sewing historic garb, and I don't need computer-assisted embroidery or the other whiz-bang features I see rolling out. I need a tough workhorse that will get me through multiple projects that's easy enough for me to load up. I prefer having a drop-in bobbin well so I can see what's going on in the innards. Sometimes if I'm sewing on a rough surface or among a lot of other stitches, the machine will jam up and create spaghetti stitches underneath which I have to cut away. Once that's cleaned up, it's fine. The Singer has gotten me through at least five projects already. I haven't broken the original needle on it yet. And it has a 25-year warranty. That's longer than my car.

One fancy-schmancy feature you will want is an automatic buttonhole setting. This has sped up many a process of creating coats and weskits. Granted, my buttonhole stitches aren't exactly top-notch, but it's better than doing it manually. Ironically, I have had to work the automatic buttonhole process semi-automatically when I needed buttonholes longer than the special buttonhole foot would allow. In those cases, I just manually flicked the mechanisms the foot would automatically trigger in its stitch path and got what I needed.

Best of all, this first machine for your humble servant wasn't ridiculously expensive. I paid $140 at Walmart. Not a bad deal at all for a workhorse.

Saturday, January 23, 2016

The Golden Touch

It worked on the red coat. Now it's time to apply the golden buttonhole trim to the new satin coat. This time I found bias tape that was folded fewer times. It didn't make it much easier in applying the Stitch Quick glue, but I think the results are worth it.


I still need buttons. I still need to find a place besides the SAS warehouse in Phoenix that will sell me buttons in large enough quantities. Once the buttons are on, the buttonhole linings will make a lot more sense.

Friday, January 22, 2016

And Now, The Breeches

I still have to put buttons and edging on my new coat, but until I find the buttons I want, I'm moving on to the breeches. As I have mentioned earlier, I'm going with a much simpler Butterick pattern rather than a time-consuming period-correct one. This is because the coat and the complimenting weskit will likely cover up much of the breeches in the places where you would notice the period-correct parts. You won't be able to tell if they're fall-front or fly-front.


This pattern comes as part of a Colonial coat, shirt, tricorn and breeches packet, so I have more patterns than I need. As expected, what I need is not on one piece of tissue paper.


I have plenty of leftover material from the coat for the breeches. Helping matters: several large pieces I have left over are nearly a perfect fit for some of the breeches parts, meaning I have less cutting to do. In all, I have four large pieces and three small ones.


After sewing for part of the afternoon and evening and stewing over whether it's prudent to make some modifications, I arrive at my result.


You will notice the bottoms that wrap around my calves are not as narrow as they probably should be. The plan is to make a slit up the sides so I can take them in with button snaps on the outer seams.


I soon find that solution is not going to take them in enough, so I will have to dart them on the inner leg seams. I intentionally made the legs wider to accommodate my big thighs. I didn't want to use elastic as the pattern directs. I was able to make the waistband just large enough to slip over my fattening tummy without the need to take anything in or leave anything out. A few buttons will complete the look.


Another necessary task: using Fray-Check on the inside seams which are unraveling like a bad mummy. I coated as many edges as I could as neatly as I could, but I still got a few spots in places I didn't need. Fortunately, it's not very noticeable given the pattern.

Thursday, January 21, 2016

Fit And Trim

I am planning to put gold trim on my new satin coat, but before I do that, I tried it on my red coat. My pieces are gold bias tape and Liquid Stitch from Walmart.

The gold trim easily fits around the buttonholes, which are pretty flimsy to begin with. That's because I had to manually work the automatic buttonhole mechanism on my machine, meaning the density around each one isn't as neat as it should be. However, the trim will not only make it more dashing, it will strengthen the edges.


Working with Liquid Stitch is a lot like working with Elmer's Glue, except you want to clean up your spots and dots of excess before you apply the iron to press it. I tried using a little on each piece, wanting to keep things neat. That didn't hold well enough. Eventually, I found I could slather it on in a way that wouldn't leak uncontrollably. Put it down, clean it up and press with the iron for 30 seconds.


Here's the result. What you can't see are the little spots of glue and leakage I've had to scrub off after they got baked onto the fabric. I had to use rubbing alcohol to get some of them off, and I didn't get everything completely off. It's not perfect, but I hope it looks prettier to you. As expected, it did stiffen up the edge so it's not so flimsy. At a distance, it looks elegant. Up close it looks a little messier. But this is a learning experience.

Wednesday, January 20, 2016

Inside Out, You Turn Me

Here's the rough insides of the nearly completed coat after two weekend days of stitching, pressing, agonizing and correcting. My great hope is that all the ugliness you see will neatly disappear into the inside. If it doesn't, or if there's too many catches and flaws and imperfections, I'm not going to be a happy person. The basic procedure is to turn this coat inside out through a small unsewn vent in the middle bottom flaps. I've shown you the outside before, but that was before I attached the inner lining.


Now, let's turn it inside out. I'm holding my breath.


Looking good! I still need to press the seams and tack up the flaps in the back. Of course, it needs buttons, too. But this project is cruising for the winners' circle.

Tuesday, January 19, 2016

Frayed Threads, Frayed Nerves

Most of the pieces of my new fancy 1740's coat are now together, and for the love of mercy, I hope they stay that way.


The continuing bane of my sewing existence is mostly the sleeves, whether it's getting them together with the cuffs or setting them into the armholes. I didn't get the edges even enough, so I've had to go back and re-stitch some edges that escaped the needle. It's a nip and tuck job all the way around. On the outside, it doesn't look half bad, although a stitch purist will give me the hairy eyeball over a lump or two. I can fix some of this with an iron.

I probably should trim some seam allowance, too. But I won't, and here's why:


That beautiful blue satin jacquard is a fraying giant. Every time I finish a stitch line, I see more golden threads running away. Yes, I know about Fray-Check. No, I don't think it will help. I just have to be careful.

Monday, January 18, 2016

Cuff 'Em

My new coat's sleeves are now sewn up, along with the lining. Now how the heck do I attach the cuffs and keep everything neat? The instructions aren't very clear.


Hmmm... is it this way?


I seem to remember I had to do something weird with the lining the last time I made this coat. But I can't recall what I did, and I didn't write it down.

I need to find a way to get the finished cuff looking something like this...


And I need to do it without continuing to stick my left hand with pins.


Let's see. What if I put the lining over the entire sleeve with the cuff and stitch the end so that I can turn the lining into the cuff?


It works!  Huzzah!


Sunday, January 17, 2016

"Use ONLY On Fabric!"

That's what I suspect should be engraved on more pairs of scissors, but suprisingly, I haven't seen it given how many tailors and seamstresses have expressed more than mild dismay at a tool intended exclusively for fabric ending up cutting other things.

I didn't know this before I started my sewing journey, but cutting paper and fabric with the same pair of scissors is a definite no-no if you want to keep them sharp. The simple explanation: fibers in the paper dull the scissors. Here's a longer discussion.

I have a good pair of Clauss metal scissors, but I've used it to cut paper more than fabric. I haven't tried it with fabric, and I don't want to because I have a rolling cutter that speeds up the job. That cutter, by the way, has only been used on fabric -- not pizza or anything else. It's sharp enough to cut skin, as I have unfortunately learned.

So guys, if you live with a seamstress, consider yourself warned. Or you may consider yourself dead.


Saturday, January 16, 2016

Project #5: The Red 1740's Coat

STARTED: August 2015

COMPLETED: November 2015 (mostly, except for a few buttons)

DEGREE OF DIFFICULTY: Medium to advanced.

THE IDEA: I love the look of mid-1700's coats. They're full and skirty and can be very foppy. If you got it, flaunt it. Next to the puffy breeches, this would be my biggest and most complex project yet. I also wanted a more comfortable red coat because the fancy privateer one I have crimps my shoulders.

THE CHALLENGES: I used a J.P. Ryan pattern with red muslin and white muslin lining bought on the cheap from SAS. Not only would this limit the damages if I blew the project, I would also have a thinner coat designed for the ravages of Arizona heat.

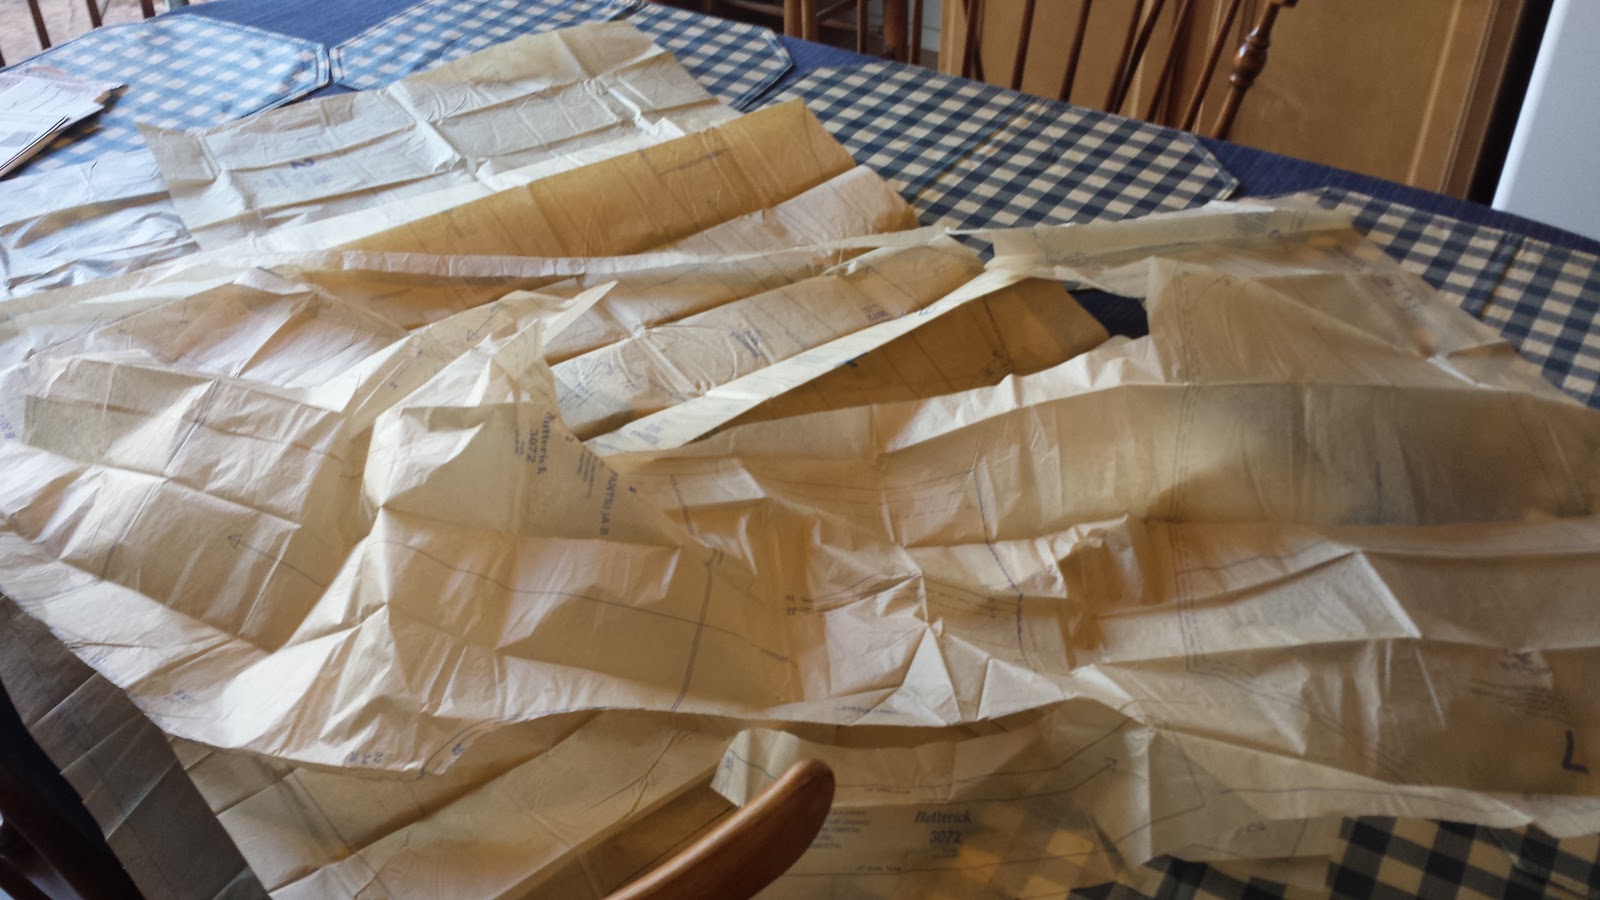
Cutting this pattern required considerably more space than my dining room table would afford. I ended up spreading the fabric and the pattern on the floor to trace before cutting.

The instructions strongly recommend pinning together a mock-up from the lining pieces to test the fit, which I did. No problems whatsoever.

Sewing the pockets into the coat front required carefully lining up several pieces on the dot and cutting carefully. The pockets are both strong and functional.

I made the mistake -- again -- of making two left sleeves. With the help of my sewing mentor, not only were we able to correct this gracefully, we were also able to attach the cuffs without having to do a hand stitch. I also lowered the seam allowance from 5/8" to about 1/4" to give my arms some extra room, especially when they're encased in a puffy shirt.

I got hints from another 1740's coat I purchased earlier this year. Sometimes it's easier for me to look at a finished garment and reverse-engineer it in my head rather than stew over instructions for half an hour and end up grabbing the seam ripper. This helped me figure out how the back pleats on the skirted part should look.

Buttonholes on the front proved too long for my automatic buttonhole attachment. I had to fake the stitch around the holes by manually flicking the mechanism on my machine when I got to the desired length. The end result is not exactly beautiful in a couple of places, but at least the seam is holding (for now). Note to self: make shorter buttonholes.

The buttons came from another visit to SAS. Unfortunately, they were too big to fit the holes for the pockets. I'm now searching for smaller pocket buttons which will compliment the large front ones.

THE RESULT: Call it "Big Red." It's a beautiful red coat, although it's not a Redcoat's red coat. Not only is it fun to wear, it's fun to dance in. The skirtiness covers up a lot of my kilt, but breeches should fare better. The swish of the skirt should draw a lady's eye to my shapely stockinged calves, which is where I want them looking!

Friday, January 15, 2016

Ugly Stitches

The second shot at the puffy shirt reveals what many of you sewing purists would consider high heresy. Look... if you dare.


Now let me elaborate. First, I'm still learning. Second, a lot of this ugliness is hidden on the inside. Still, I need to figure out a way to hide gathering better. I pulled it off on the puffy breeches, but in that case, I had some help from one of my sewing mentors.


I've tried to tuck the gathering into the cuff on the inside, but I haven't figured out a way to pin it up neatly, without all the gathering falling apart or something turning crooked. It looks easy when I see it done right and think about reverse-engineering the result, but in practice it's a cruel task. I've become good friends with the seam ripper.